Simple Login System Design Using PHP And MySql Database
This login system is a very simple design concept that can be found on any website that has a user login concept. We have already designed a number of login form interfaces, you can visit that playlist. The purpose of creating a login system is to collect user data and provide them some services that are not acceptable to normal users. So when you log in on that website you can able to use their services.
In this article, we will present a very simple concept for the login system. After this article, you will have the ability to design a login system. But we need some software and technologies that are used in this login system design. Before making this system, we will have to understand the technologies involved.
We will discuss every step in detail but you have to be attentive and try to understand what's is going on. So let's discuss.
Required Technologies
Let us first see what kind of technologies we are using to design this system. You don't need in-depth knowledge of all these techniques to design this system. If you have even basic knowledge then you can do it.
- 01. HTML
- 02. CSS
- 03. PHP
- 04. MySql
Required Softwares
Now, let's look at the main technologies that will be used to develop this system. In order to make your system work faster and get the work done in less time, it is very important to have these following software programs. You can check out the article on code Editing software.
- 01. Text Editor(Atom, Vs Code, Sublime)
- 02. Browser(Chrome, Safari, Opera)
- 03. PHP Local Server(WAMP, XAMPP, AMPPS)
- 04. MySql Database(inbuilt in PHP software)
client-server model
Login systems operate on a server-client model. It is used on every website that performs crud (create, read, update and delete) operations. You can see the image below how the client-server architecture. We are using wamp software for php server and database as we told you earlier.
FLOW CHART
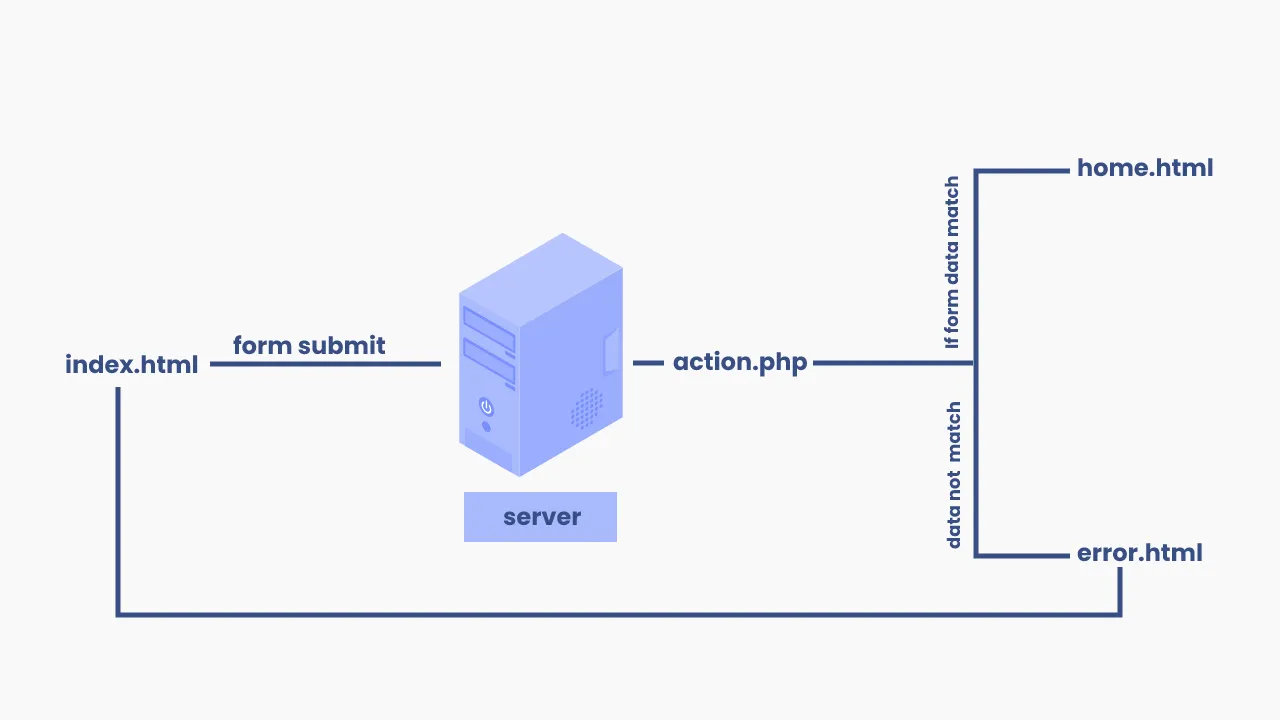
Only one concept is left that will show us the flow of our login system. As you can see in the below image where we have three HTML files(index.html, error.html and home.html) that will show us content in the browser window. We have one file of PHP( action.php), which handles the login submitted data and takes action according to the situation as you can see in the image.
01. index.html
After all the basic knowledge of this system let's look ahead and try to apply everything practically. So let's design the login form that will take data from the user. So we are designing this form using simple HTML code which is below. This is an 'index' file that is visible to the user.
<!DOCTYPE html>
<html>
  <head>
    <title>Simple Login System Design Using Php And MySql | Rustcode</title>
    <link rel="stylesheet" href="style.css">
  </head>
  <body>
    <section>
      <form method="post" class="log-form" action="action.php">
        <div class="heading-container">
          <h2>Welcome back!</h2>
          <p>Please enter your login details</p>
        </div>
        <div class="group log-input">
          <input type="email" name="email" placeholder="Email" required>
        </div>
        <div class="group log-input">
          <input type="password" name="password" placeholder="Password" required>
        </div>
        <div class="group form-link ">
          <span>
          <input type="checkbox">Remember Me
          </span>
          <a href="#">Forgot Password?</a>
        </div>
        <div class="group">
          <button type="submit" class="btn">LOGIN</button>
        </div>
      </form>
    </section>
  </body>
</html>
02. style.css
Now let's work on the 'Login form' user interface because aligning HTML elements creates a better user experience and interface. In the below code we write css code. We also include the Poppins font family in css file.
@import url(https://fonts.googleapis.com/css?family=Poppins);
* {
    box-sizing: border-box;
    font-family: "Poppins", sans-serif;
}

body {
    padding: 0px;
    margin: 0px;
    background: #eee;
    display: flex;
    height: 100vh;
    justify-content: center;
    align-items: center;
}

.heading-container {
    text-align: center;
    margin-bottom: 40px;
    padding: 0px;
}

.heading-container>* {
    margin: 0px;
    padding: 5px;
}

.log-form {
    width: 380px;
    border-radius: 4px;
    margin: 2em auto;
    padding: 3em 2em 2em 2em;
    background: #fafafa;
    border: 1px solid #ebebeb;
    box-shadow: rgba(0, 0, 0, 0.14902) 0px 1px 1px 0px, rgba(0, 0, 0, 0.09804) 0px 1px 2px 0px;
}

.group {
    position: relative;
    margin-bottom: 30px;
}

.log-input {
    font-size: 18px;
    width: 100%;
    border: none;
}

.form-link {
    display: flex;
    flex-direction: row;
    align-items: center;
    justify-content: space-between;
    font-size: 12px;
}

.log-form a {
    font-size: 11px;
    font-weight: 500;
    color: black;
}

input[type="email"],
input[type="password"] {
    width: 100%;
    border: 2px solid #7768AE;
    font-family: "Poppins", sans-serif;
    font-size: 12px;
    font-weight: 600;
    padding: 12px;
}

.btn {
    width: 100%;
    padding: 10px 0px;
    background-color: #7768AE;
    cursor: pointer;
    font-size: 16px;
    font-family: "Poppins", sans-serif;
    color: #fff;
    border: none;
    font-weight: 500;
}:
03. Database Design
We are using wamp software to create this login system. You can read the full document of the wamp software from the wamp official site. This software has a MySQL database to store data. There are two methods to create a database and table. The first method is using a console and the second is using MySQL interface. We will use the interface method because it is a fast and easy method.
First, start wamp software then open your web browser and go to localhost. Now login with 'root' user after that select 'new database' then enters the database name, we gave database name "login demo". Now time to create a table inside the database. Click on the 'new table' and give the table name accordingly, we gave "user". Then next is to create the column in the table. The column has three important properties first is their name, the second is their value type and the third is length. As you can see in the image.
Now your database is ready. You can store data in the table. But we need some extra knowledge to store data in the database. Because the database can not store everything. So we will use PHP language as server-side that help us to perform data deletion, insertion, updating tasks, etc.
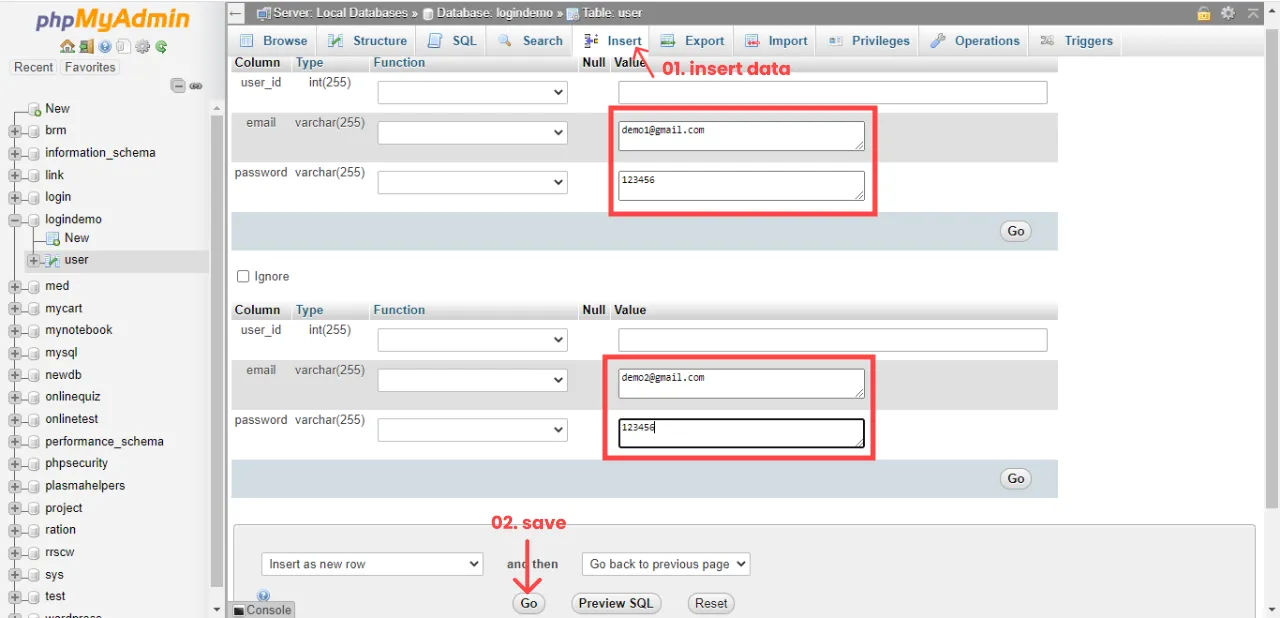
After creating a database and table we inserted some dummy data in that table so that we can perform login operation. You can see in the image.
04. Database Connection
After creating a database and a table in that database to store login data. Now We will connect our website server with the MySQL database So that we can easily extract and import data in the MySQL database. Below is the PHP script which will help us to connect the MySQL data and the server.
<?php
 $host = "localhost";
 $user = "root";
 $password = '';
 $dbname = "databasename";

  $con = mysqli_connect($host, $user, $password, $dbname);
   if(mysqli_connect_errno()) {
    die("Failed to connect with MySQL: ". mysqli_connect_error());
   }
?>
05. Action.php
This file (action.php) will handle the login form data after the form is submitted and will take the redirect decision accordingly. As you have already seen in the flow chart.
You can see in the code of the "action" file that if the submit details in the form match the data entered in "MySQL", we will go to the "homepage", but if it doesn't match, you will be redirected "Error" page. So that you can get the login option. You can also redirect to index.html instead of redirecting to the error page
<?php
 $email=$_POST['email'];
 $password=$_POST['password'];

 $con=mysqli_connect('localhost','root','','logindemo');
 $q="Select * from user where email='$email' && password='$password'";
 $result=mysqli_query($con,$q);
 $n=mysqli_num_rows($result);
 if($n==1){
  header('location:home.html');
 }
 else{
  header('location:error.html');
 }
?>
06. Login Successful (Home.html)
This homepage design is done with the help of HTML and CSS. This is a very simple page, just made to show you that we are on a new page.
HTML
<!DOCTYPE html>
<html>
<head>
  <title>Homapage | Rustcode</title>
</head>

<body>

   <h1>Welcome to homepage!</h1>

</body>
</html>
CSS
body {
  padding: 0px;
  margin: 0px;
  display: flex;
  justify-content: center;
  align-items: center;
  height: 100vh;
  font-family: "Popiins", sans-serif;
  background-color: #C7EDE4;
  text-transform: uppercase;
}
07. Login Failed (Error.html)
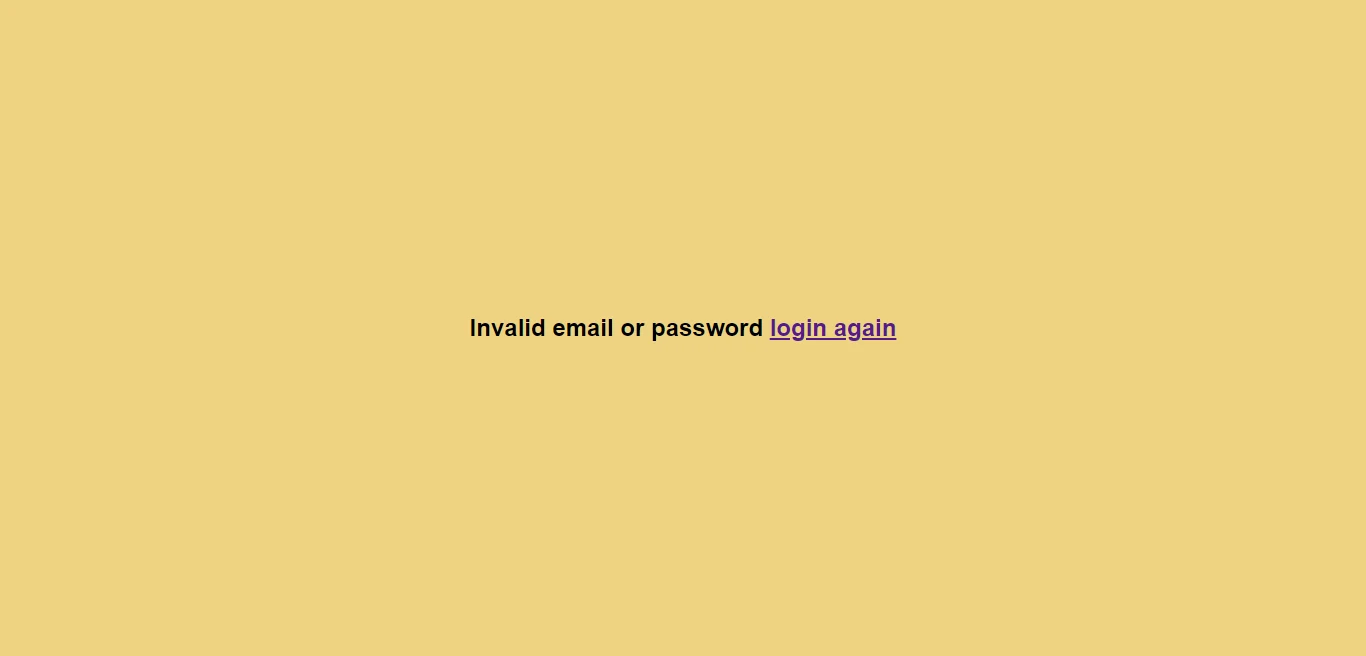
Now this is the design of the error page, this is also a very simple page in which the link of the login page is given so that you can go back to the login page
HTML
<!DOCTYPE html>
<html>

<head>
 <title>Login Failed | Rustcode</title>
</head>

<body>

  <span>Invalid email or password <a href="index.html">login again</a></span>

</body>
</html>
CSS
@import url('https://fonts.googleapis.com/css?family=Poppins');
body {
  padding: 0px;
  margin: 0px;
  display: flex;
  flex-direction: column;
  justify-content: center;
  align-items: center;
  height: 100vh;
  font-family: "Popiins", sans-serif;
  background-color: #EDD382;
  font-size: 24px;
  font-weight: 600;
  line-height: 1.5em;
}
08. Souce Code
We would suggest you to practice yourself and write the code. But if you want to download the code then you can do it by clicking on the button given below.
We try to provide you the best content, if there is any mistake in this article, then let us know.


Comments
Post a Comment